
 UKR
UKR RU
RU SK
SK


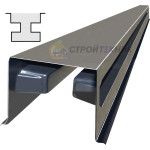
Making concrete posts with your own hands can be a simple and fun
process if you use modern ABS moulds. This method allows you to create strong
and durable posts for various purposes: from fences to decorative elements.
Step 1: Preparing the necessary materials and tools
Before you start making the posts, make sure you have all the materials
and tools you need:
- Concrete
mix: you can use ready mix or prepare it yourself by mixing cement, sand and
gravel in the correct proportions.
- ABS moulds: choose high
quality moulds that will ensure the accuracy and durability of your
finished products.
- Grease for
the moulds: to make it easier to remove the poles from the
moulds, use a special grease.
- Reinforcement:
metal bars to reinforce the posts.
- Tools: bucket,
shovel, level, concrete vibrator (optional).
Step 2: Preparing the mould
Before pouring concrete it is important to prepare the ABS moulds
properly. Clean them of dust and dirt, then apply grease to prevent the
concrete from sticking. Make sure that the mould is on a level surface to
prevent the finished product from skewing.
Step 3: Pouring the concrete into the mould
Prepare the concrete mix by following the manufacturer's instructions.
If you make the mixture yourself, thoroughly mix all the ingredients to a
homogeneous consistency. Pour the concrete into the mould, gently spreading it
over the entire surface. Use a concrete vibrator or tapping the mould to remove
air bubbles and ensure the mould is filled tightly.
Step 4: Installing the reinforcement
Use metal bars of rebar to increase the strength and durability of the
posts. Insert the reinforcing bars into the mould until they are fully immersed
in the concrete. Make sure that the bars are evenly spaced and do not extend
beyond the mould.
Step 5: Removal and final treatment of the posts
After pouring the concrete, give it time to harden. Depending on weather
conditions and mix composition, this may take from several hours to several
days. Once fully cured, carefully remove the posts from the mould. If
necessary, carry out additional treatment: deburr, sand the surface or apply a
protective coating.
Tips and advice
- Choice of
shape: use a variety of shapes to create unique and attractive posts. ABS
moulds offer a wide range of designs and sizes.
- Concrete
quality: use quality ingredients for the concrete mix. This will ensure the
durability and strength of the finished posts.
- Moisture
control: do not allow concrete to dry out during curing. Moisturise the surface regularly, especially in
hot weather.
- Safety: Observe
safety rules when working with concrete mix and tools. Use safety goggles and gloves.
Making concrete posts using ABS moulds is a simple and effective way to
create quality products for your construction project. By following these steps
and tips, you will be able to make your own durable and aesthetically pleasing
posts that will last for years to come.
23/07/2024